Click Image For The Sailboat Company's Home Page
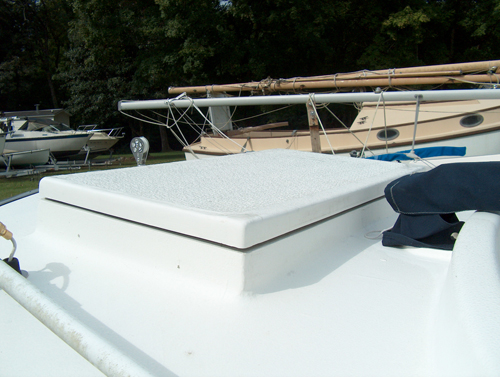
The Most Used Part Of Any Boat
The most used parts of any boat are hatch covers. They open and close and sometimes drop with a bang. Minor repairs on most hatch covers are easy, but what if you need one and the builder is no longer in business. I have seen wood and fabric covers on some older boats that are not pretty. We all know a happy boat is a dry boat and I'm sure some of those ugly covers leaked. Most professional repair facilities know how to build a hatch cover. In fact, they keep and store as many old hatch covers as possible just for that purpose. This article is about making a replacement hatch cover to replace a missing one that has been lost.
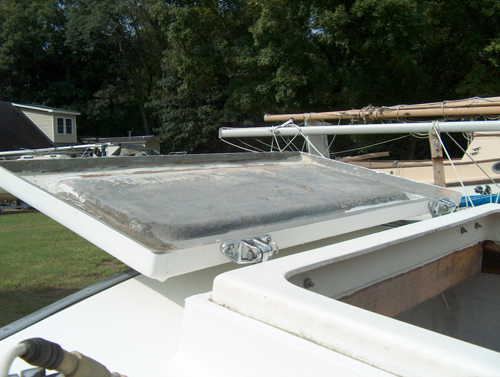
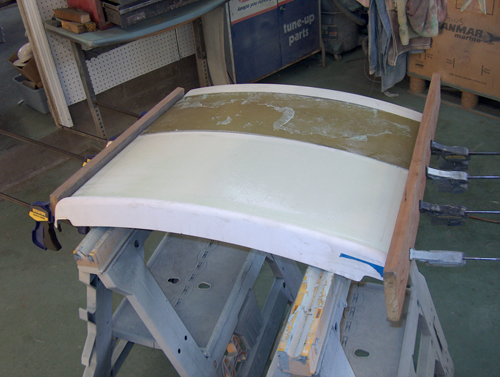
We recently needed to replace a hatch cover because the old one came off going down the road. I looked at our supply of used covers and I picked out one that came closest to the original cover. The replacement can be bigger or smaller. It needs to be a hatch that requires the least amount of work to be a good replacement. In this case, a Com-Pac 16 sliding overhead hatch is a little too wide and about 8 inches too short to replace our missing Cape Dory Typhoon hatch. Not a bad match, but it will need some glass and cosmetic work. To make the Com-Pac 16 hatch longer, we made a 10-inch flash mold of the top of the 16 hatch. We cut the 16 hatch in two pieces by making a cut 2.5 inches from the front end of the 16 hatch. The best places to add length to the hatch is in the middle and avoid the curves at both ends. We made a laminate for the splice using our flash mold. Then we glassed our 8-inch laminate to the two hatch pieces. We now have a hatch cover with the correct length front to back. We still need to take a splice out of the middle to adjust the width and then glass it back together for a perfect fit. The hatch has to be trimmed, filled and gel-coated to look like new. When you do your build, keep the non-skid organized and neat. Try to do your cutting in the flat gel-coated areas adjacent to the non-skid. Glassing a hatch back together at the edge of the non-skid requires less work. Use the bevel and tape method to attach the pieces and keep the alignment correct so the hatch will fit well.
The Com-Pac hatch in this example is a better hatch than the original equipment. Sometimes improvements can be made. The new hatch cover is less flexible than the original. This new cover is not going to blow off.
Some larger flat hatch covers are easy to make smaller. This example is a Com-Pac 27 seat hatch cover reduced in overall size and modified in shape. A lazarette hatch cover was needed that had a flat surface and four vertical sides of the same height. The vertical sides of a 27-seat hatch vary from front to back and side to side. They had to be adjusted to the same size. The flat surface needed to be reduced in both directions. We used a table saw to cut a line next to the non-skid on one end and on one side. We then cut out and removed two pieces of non-skid that would reduce the size in both directions. After the length and width were double checked, we glassed the ends back in place. The result is a hatch cover that works and fits well. We still need to paint the bottom to make it perfect.